Are you tired of physically accessing your Raspberry Pi every time it needs an update? Embracing remote update methods for your Raspberry Pi is not just a convenience; it's a necessity in today's interconnected world, allowing you to maintain security, optimize performance, and ensure seamless operation of your projects without stepping a foot near the device.
There are several ways to remotely update your Raspberry Pi, each with its own advantages and disadvantages. The key is to choose a method that aligns with your needs and technical expertise. Whether your Raspberry Pi is tucked away in a remote weather station, acting as the brains of your home automation system, or simply residing in another room, the ability to update it without physical access is invaluable. Instead of making the trek to the device whenever an update is needed, you can do it remotely, saving precious time and effort.
By enabling remote access, you can perform updates without being physically present at the device. This is particularly useful for Raspberry Pi setups in remote locations or for users who manage multiple devices. Downloading free updates for your remote Raspberry Pi and IoT devices is easier than you might think. This guide will cover everything you need to know about remote update Raspberry Pi download, from setting up your system to troubleshooting common issues. So whether you're tinkering with home automation or building a media server, this article has got your back.
Read also:Telugu Movies More Insights Where To Watch 2024
This article delves into the best practices, tools, and strategies for performing remote updates on your Raspberry Pi. By the end, you'll have a solid understanding of how to download and implement the best remote update solutions for your Raspberry Pi projects.
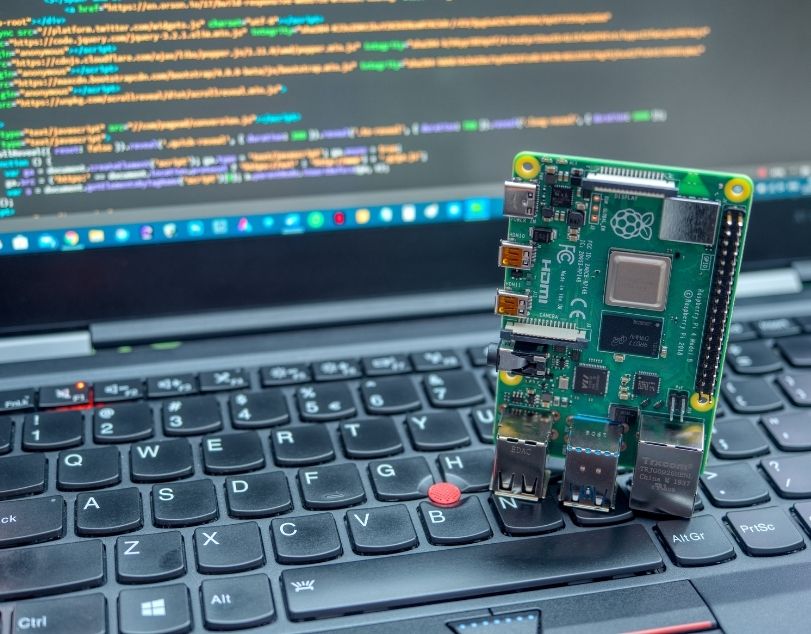
Remote updates are particularly useful if your Pi is set up in a remote location, like a weather station, home automation hub, or even just another room in your house. Instead of dragging yourself over to the device every time an update is needed, you can do it remotely, saving time and effort. For this guide, Im using a Raspberry Pi Zero W (with an external Ethernet adapter). I know its going to be a bit slow during the setup process, but this will prove that it will work on the most basic model. A Raspberry Pi 5 is overkill and to a lesser extent, so is a Pi 4.
When it comes to remote update Raspberry Pi download, following best practices ensures a smooth and successful process.
This guide will cover everything you need to know about remote update Raspberry Pi download, from setting up your system to troubleshooting common issues. So whether you're tinkering with home automation or building a media server, this article has got your back.
Remote updates on Raspberry Pi are essential for maintaining security, optimizing performance, and ensuring seamless operation of your projects.
Installing NoMachine to the Raspberry Pi is one method to achieve this.
Read also:Explore Viralkand News Trends Viral Content Insights
The hdmi output on a Raspberry Pi Zero, or Raspberry Pi model 1, 2 or 3, or the hdmi0 output on a Raspberry Pi 4, 5, or 400. The hdmi1 output on flagship models since Raspberry Pi 4B, compute modules since CM4 (including CM4s), and keyboard models. The Raspberry Pi touch display or Raspberry Pi touch display 2.
Remote OTA update for IoT devices and Raspberry Pi. As IoT technology is constantly evolving, it is important for IT administrators to plan for IoT devices and Raspberry Pi device updates. Vendors can also release fixes and updates to the software, device controllers, or firmware at any time; therefore, IT administrators must plan for them.
You can use any Raspberry Pi for a hamclock. The Raspberry Pi Imager is the quick and easy way to install Raspberry Pi OS and other operating systems to a microSD card, ready to use with your Raspberry Pi. Download and install Raspberry Pi Imager to a computer with an SD card reader. Put the SD card you'll use with your Raspberry Pi into the. This isnt just about keeping your tech running smoothlyits about empowering you to take control of your projects without breaking the bank.
Remote Update Methods for Raspberry Pi
There are several effective methods to remotely update your Raspberry Pi, each with its own strengths. The best choice for you will depend on your technical comfort level, your network setup, and the specific requirements of your project.
1. Secure Shell (SSH)
SSH is a secure protocol for accessing a remote computer over a network. It's a fundamental method for managing your Raspberry Pi remotely. You can connect to your Pi's terminal from your computer and execute commands as if you were sitting in front of it. This includes updating software, upgrading firmware, and configuring settings. SSH offers a high level of control and is a versatile option, especially for users familiar with the command line. To update via SSH, you'll typically use the `apt update` and `apt upgrade` commands.
Advantages:
- Widely available and supported.
- Secure, encrypted connection.
- Allows for complete control via the command line.
Disadvantages:
- Requires some familiarity with the command line.
- Requires the Raspberry Pi to be connected to a network.
- Can be more complex to set up initially, especially if you're behind a NAT router.
2. Virtual Network Computing (VNC)
VNC allows you to view and control the graphical desktop environment of your Raspberry Pi remotely. This is ideal for users who prefer a visual interface. With VNC, you can interact with the Pi's desktop as if you were using a monitor, keyboard, and mouse connected directly to it. You can download and install RealVNC on the Raspberry Pi. After that, youll get access to the full desktop environment of your Raspberry Pi, and can do whatever you want from the comfort of your main computer. You will install a VNC server on the Raspberry Pi and a VNC viewer on your computer.
Advantages:
- Provides a graphical user interface (GUI).
- Easy to set up and use for those unfamiliar with the command line.
- Allows you to see and interact with the entire desktop.
Disadvantages:
- Can be bandwidth-intensive, leading to lag on slower networks.
- Less secure than SSH if not configured properly.
3. Remote Desktop Protocol (RDP)
RDP is another way to access the graphical desktop remotely. It is similar to VNC, but can sometimes offer better performance, especially on Windows clients. To use RDP, you would need to install an RDP server on your Raspberry Pi and use an RDP client on your computer. After that, youll get access to the full desktop environment of your Raspberry Pi, and can do whatever you want from the comfort of your main computer.
Advantages:
- Provides a graphical user interface (GUI).
- Potentially better performance compared to VNC.
- Easy to set up and use for those unfamiliar with the command line.
Disadvantages:
- Can be bandwidth-intensive, leading to lag on slower networks.
- Less secure than SSH if not configured properly.
4. NoMachine
NoMachine is a remote desktop solution known for its speed and ease of use, especially over slower connections. It offers a seamless experience, allowing you to control the Raspberry Pi's desktop as if you were sitting in front of it. Installing NoMachine on the Raspberry Pi is generally straightforward. For example, to set up Nomachine on the Raspberry Pi, install NoMachine from the official website or the package manager. Select your Raspberry Pi device (I was working with a Raspberry Pi 400, so I chose a Raspberry Pi 4). Next, click on choose OS. Scroll to the bottom of the list and choose use custom. Browse to where you have downloaded the parrot OS image file, select it, and click open.
Advantages:
- Fast and efficient, even over slower connections.
- Offers a good user experience.
- Easy to set up and use.
Disadvantages:
- Requires installation of the NoMachine server on the Raspberry Pi.
- May not be open-source, depending on the version used.
5. Remote Access Services (TeamViewer, AnyDesk, etc.)
Services like TeamViewer and AnyDesk offer user-friendly solutions for remote access and control. They often provide a simple setup process and require minimal technical knowledge. These services typically use a client-server model, allowing you to connect to your Raspberry Pi from anywhere with an internet connection. Remote access services are perfect teamviewer alternative for secure, private, and customizable remote access.
Advantages:
- Easy to set up and use.
- Often provides cross-platform compatibility.
- No need to discover the IoT device IP and change any firewall settings.
Disadvantages:
- May have limitations on free accounts.
- Security depends on the provider.
- Requires an internet connection on both ends.
6. Using a Web Portal
You can send commands and batch jobs to a Raspberry Pi from a web portal. Directly connect to the Raspberry Pi behind a firewall from anywhere as if it was on the local network. No need to discover the IoT device IP and change any firewall settings. This approach simplifies remote management and control, especially for multiple devices.
Best Practices for Secure Remote Updates
Security should be a top priority when performing remote updates. Implementing robust security measures is essential to protect your Raspberry Pi from unauthorized access and potential threats.
Follow these best practices to protect your Raspberry Pi:
- Use strong, unique passwords for SSH access. Avoid easily guessable passwords and consider using a password manager to generate and store strong passwords.
- Limit SSH access to specific IP addresses using firewall rules. This restricts access to only trusted devices or networks.
- Keep your Raspberry Pi's operating system and software up to date. Regularly update packages and firmware to patch security vulnerabilities.
- Disable password-based authentication for SSH and use key-based authentication instead. This is more secure than password authentication.
- Configure a firewall on your Raspberry Pi to restrict incoming and outgoing network traffic. This helps prevent unauthorized access and protects your device from attacks.
- Regularly monitor your Raspberry Pi for any suspicious activity. Check logs and network traffic to identify potential security breaches.
- Consider using a VPN (Virtual Private Network) to encrypt all network traffic between your computer and the Raspberry Pi. This adds an extra layer of security when accessing your device remotely.
Step-by-Step
SSH (Secure Shell) is a powerful tool for remotely managing your Raspberry Pi. Here's how to update it using SSH:
- Enable SSH: By default, SSH might be disabled on your Raspberry Pi. You can enable it through the Raspberry Pi Configuration tool or by creating an empty file named "ssh" in the boot partition of your SD card before booting your Pi for the first time.
- Find Your Raspberry Pi's IP Address: You'll need the IP address of your Raspberry Pi to connect via SSH. You can find this through your router's admin interface, by connecting a monitor and keyboard directly to the Pi and using the `ifconfig` command, or by using a network scanner.
- Open a Terminal: On your computer, open a terminal or command prompt.
- Connect to Your Raspberry Pi: Use the `ssh` command, followed by your Raspberry Pi's username@IP address. For example: `ssh pi@192.168.1.100` (replace `pi` with your username and the IP address with your Pi's actual IP address).
- Enter Your Password: When prompted, enter your Raspberry Pi's password.
- Update Package Lists: Once connected, run the command: `sudo apt update`. This updates the package lists from the repositories.
- Upgrade Installed Packages: After updating the package lists, run the command: `sudo apt upgrade`. This upgrades all installed packages to their latest versions.
- Upgrade Firmware: Sometimes, you'll need to upgrade the Raspberry Pi's firmware. Run the command: `sudo rpi-update`. Be cautious with this command, as it updates to the latest firmware version, which may sometimes have compatibility issues. Its generally recommended to update firmware only when necessary.
- Reboot Your Raspberry Pi (Optional): After the updates are complete, you may need to reboot your Raspberry Pi for the changes to take effect. Run the command: `sudo reboot`.
Installing Raspberry Pi OS Using Raspberry Pi Imager
Raspberry Pi Imager is the quick and easy way to install Raspberry Pi OS and other operating systems to a microSD card, ready to use with your Raspberry Pi. Download and install Raspberry Pi Imager to a computer with an SD card reader. Put the SD card you'll use with your Raspberry Pi into the.
Selecting the Operating System
Select your Raspberry Pi device. Next, click on choose OS. Scroll to the bottom of the list and choose use custom. Browse to where you have downloaded the parrot OS image file, select it, and click open.
Troubleshooting Common Issues
Even with the best practices in place, you might encounter some issues during the remote update process. Here's how to troubleshoot common problems:
- Connection Issues: If you can't connect via SSH, check your network connection, the Raspberry Pi's IP address, and your firewall settings. Ensure SSH is enabled on the Raspberry Pi.
- Password Issues: If you're having trouble with passwords, double-check that you're using the correct username and password. If you've forgotten your password, you may need to re-flash your SD card.
- Firewall Issues: Ensure your firewall isn't blocking SSH or VNC traffic. You may need to configure port forwarding on your router.
- Package Update Failures: If the `apt update` command fails, there might be issues with your internet connection or the package repositories. Try again later or check your network settings.
- Firmware Update Failures: If `rpi-update` fails, it's possible the firmware update encountered errors. In this case, it's recommended to investigate the issue and look for potential solutions online.
It's the Raspberry Pi user and password, so it depends on your settings. You should then get access to the full interface of the Raspberry Pi. After that, youll get access to the full desktop environment of your Raspberry Pi, and can do whatever you want from the comfort of your main computer.
This isn't just about keeping your tech running smoothlyits about empowering you to take control of your projects without breaking the bank.
Conclusion
Mastering remote update techniques for your Raspberry Pi is a crucial skill for any user managing these devices, whether in a home lab or a more extensive deployment. By choosing the right methods, prioritizing security, and following the best practices outlined in this article, you can ensure your Raspberry Pi projects remain secure, performant, and up-to-date, all while saving time and effort. No matter your specific needs, there's a remote update solution that will work for you. This is particularly useful for raspberry pi setups in remote locations or for users who manage multiple devices. The ability to update without the need to physically touch the hardware is not just a convenience; it's a key element of efficient and secure remote management.